- My first campaign
- Your first call in 3 minutes
- Going live with your campaign
- Adding users
- Arranging form fields
- Setting a caller ID
- Exporting call results
- Topping up your call credit
- Making calls
- Campaign templates
- Simple Campaign
- Multi-step campaign
- Calendar Campaign
- Setting up your calendar campaign
- How to customize your calendar to your needs
- Calendar options
- Create sales appointment
- Reports from the sales team? No problem.
- Is it possible to adjust the status?
- Survey
- Shopping Cart
- Mastering Dialfire
Calendar campaign
You would like to schedule external appointments for your sales team with Dialfire? No problem. Use our Calendar campaign!
Setting up your calendar campaign
Dialfire lets you connect to a Google calendar as well as an MS Office 365 calendar.
- Ask your sales team to log in to the calendar-guard website with their Gmail or Office365 account.
To connect a calendar, you need to log in to the following address:
-
Google Calendar: https://gcal.calendar-guard.com/
-
Office365 Calendar: https://office365.calendar-guard.com/
-
Exchange Calendar: https://exchange.calendar-guard.com/
Note that you can only connect a cloud-based calendar.
- Go to the Campaigns tab in the menu and open the ressouces tab in the upper right part.
- Enter the generated access code in line 7
- Save the process in the upper right corner
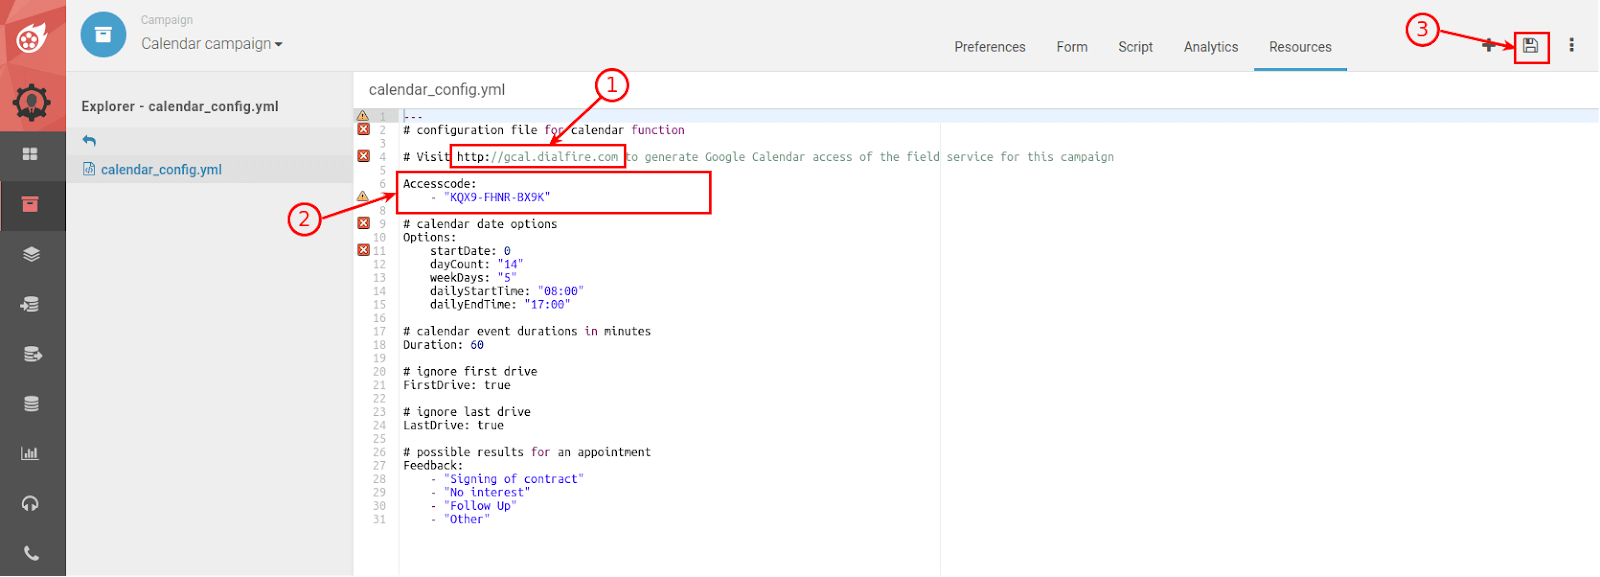
- Finally, click on the Campaigns tab in the menu again, and reload the mask.
- Now switch to the Agent Preview to check

How to customize your calendar to your needs
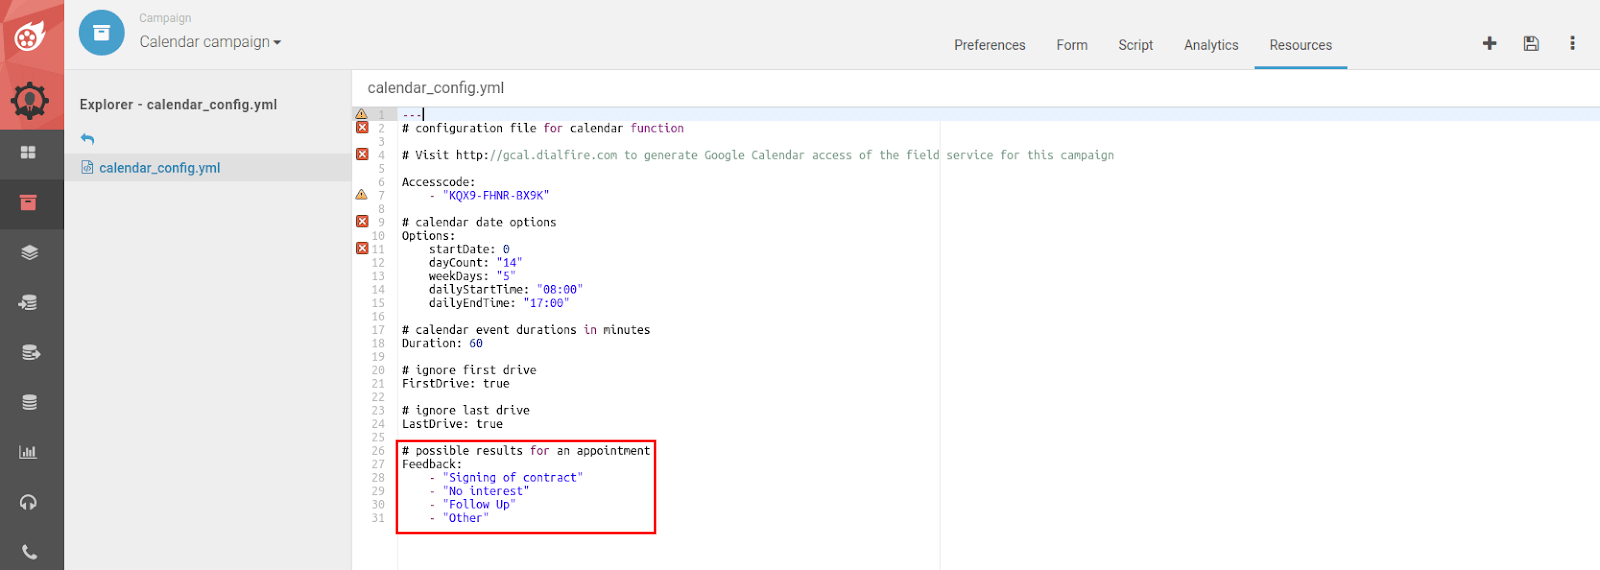
Using the calender_config.yml file, you can adjust the following parameters between line 9 and line 24:

Calendar options
Options:
startDate: "0" +/ - Days from next Monday
dayCount: "14" Amount of days in the calendar view
weekDays: "5" 1 - 7 days from Monday
dailyStartTime: "08:00" Start of working hours
dailyEndTime: "17:00" End of working hours
Appointment duration in minutes
Duration: 60 -> Appointment duration
Ignore first drive
FirstDrive: true -> true = Arrival time from the first appointment is ignored > false = Arrival time from the first appointment is considered
Ignore last drive
LastDrive: true -> true = Way home from last appointment is ignored -> false = Way home from last appointment will be considered
Create sales appointment
The calendar knows three different colors:
- Gray - Meeting planned. (Dark gray session planned by Dialfire, light gray - other events / appointments)
- Green - No scheduled meetings yet. Note that dark green spots are more convenient because less time is wasted traveling and / or waiting.
- White - Meetings are neither planned nor possible due to the geographical distance.
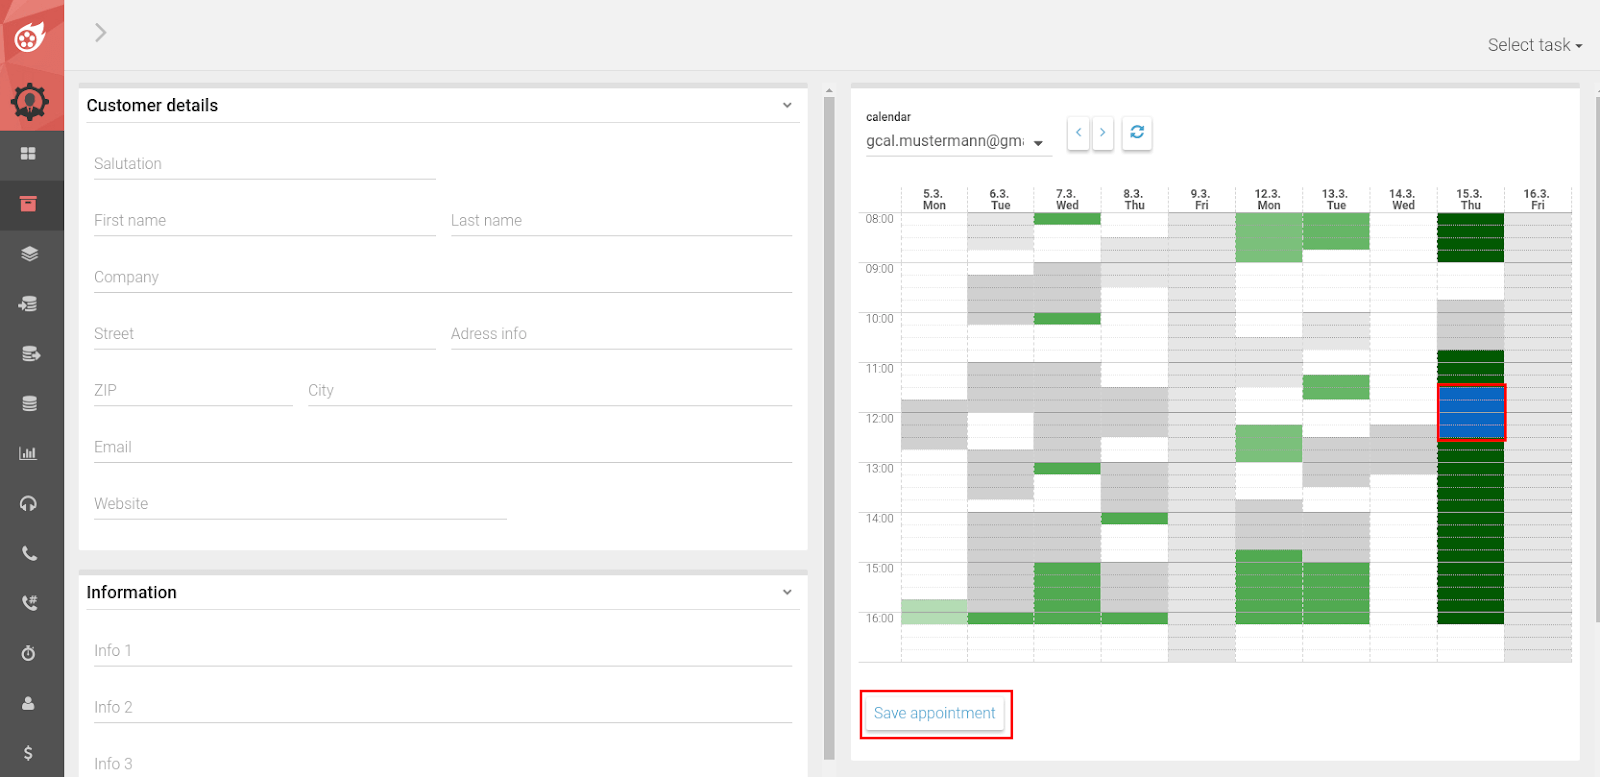
Note: Travel times are only an estimate - based on Google coordinates.
To schedule an appointment, follow these steps:
- Click in the green area. Dialfire checks the travel times between locations with a thorough Google Maps distance calculation. The result is displayed in a saturated green, provided that it is still possible to reach the meeting location in time after recalculation.
- Choose your preferred time within the previously tested time slots. This will be marked in blue.
- To book the meeting, click on "Save appointment"
Reports from the sales team? No problem.
The sales staff has the possibility to inform about the appointment outcome to Dialfire. To do this, he/she has to open the feedback URL in his/her Gmail/Office365 calendar:
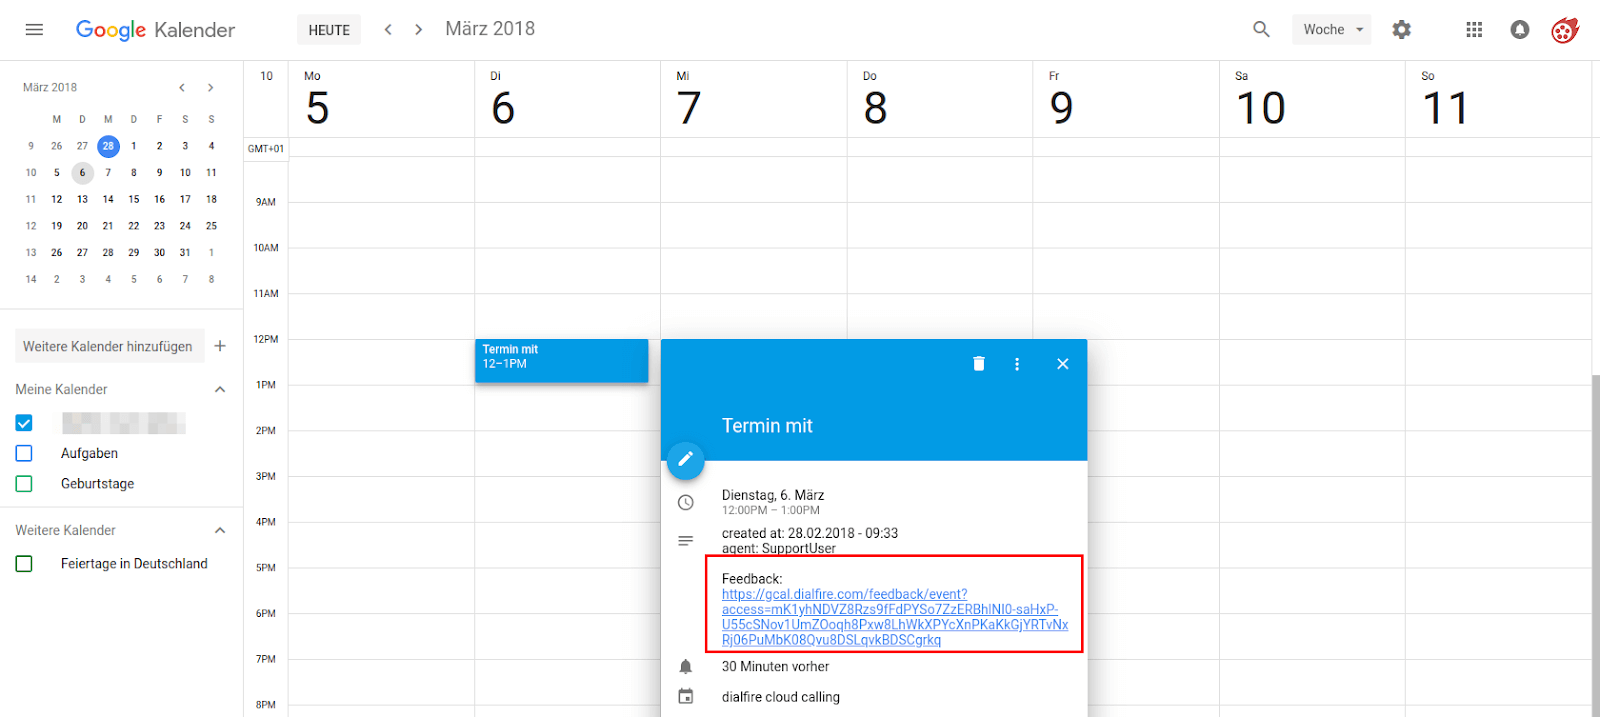
Now he/she can select a feedback status and enter a result:
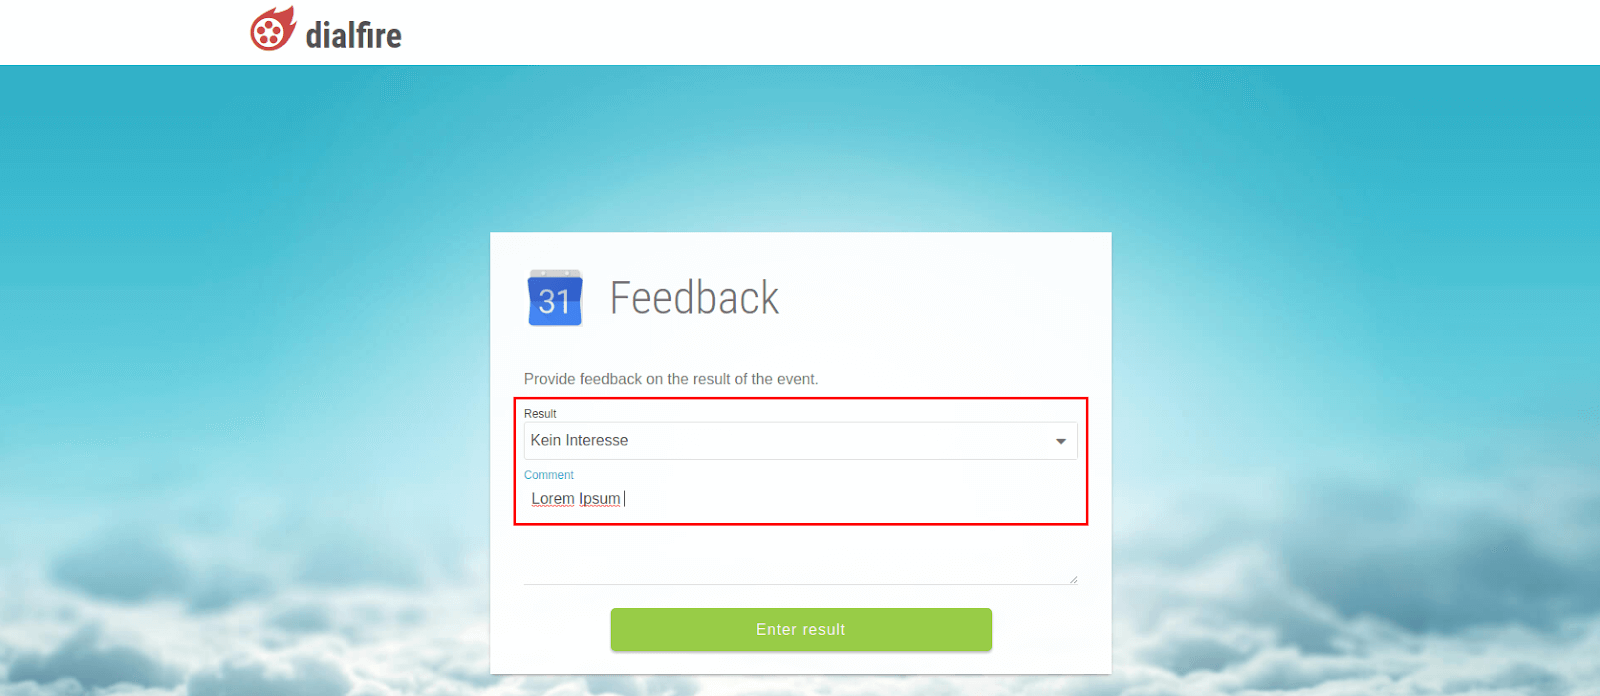
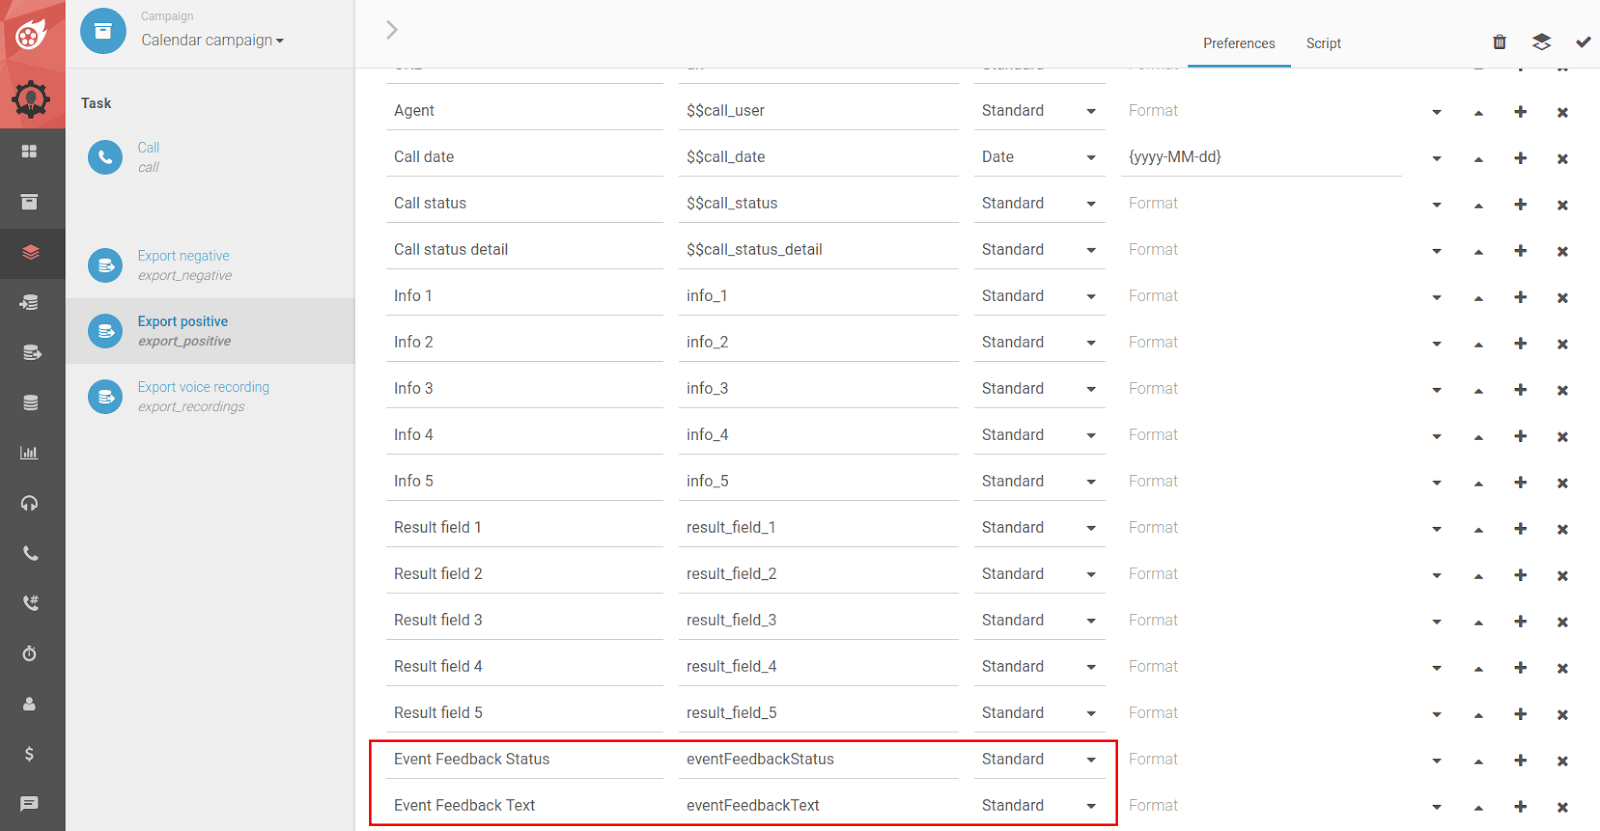
Both feedback status and the result are then released in the export. If the agent calls the contact in the telephony for a second time, this result does not appear in the agent mask.
Is it possible to adjust the status?
You will find the file calender_config.yaml in the Campaigns menu under the Files tab.
From line 28 you have the possibility to create your own status of your choice. Important: The status must be between two quotation marks. In our example "contract signing".
